Creating Service Times
Adding Service Times are an important step in getting started using Church Metrics. Once you have your service times created, you will be able to enter data into Church Metrics that you can then view in reports and on the Dashboard.
Accessing Service Times

- From the Profile drop down, select "Admin"
- From the Admin Navigation, select "Service Times"
Add New Service Time

- Once you are on the Service Times page, select "New Service Time" to launch the new service time page
New Service Time Page
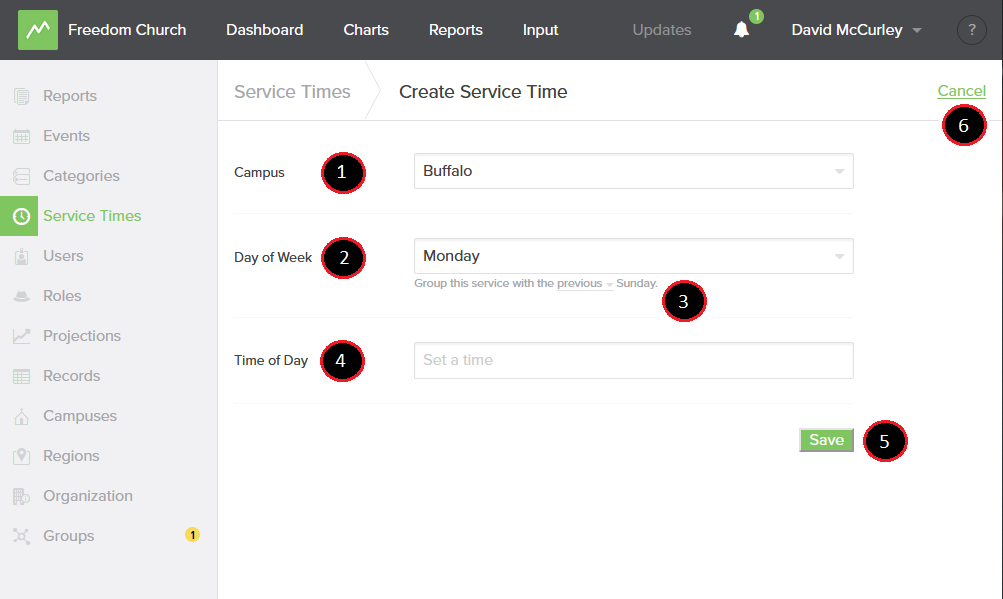
1. Campus: this will show only campuses you have created. If you have not created a campus yet, you will want to do so. If you need help you can see our "Creating a Campus" documentation
2. Day of Week: what day of the week your service time is on
3. Group this service with the _____ Sunday: In Church Metrics, all categories are grouped by week in relation to Sunday. When recording data for weekday services you may add that data to the current week or to the following week. By default, Church Metrics will associate your weekday services with the current Sunday.
4. Time of Day: In military time, you will need to specify what time of day the service is on
5. Save: Be sure to save!
6. Cancel: If you need cancel your entry, you can select "Cancel"
Editing and Deleting

If you would like to edit or delete your service time at any point, you can go back into the "Service Times" tab and update them.